Sommario
- Suggerimenti per la fotografia invernale
- 1. Comprendere le condizioni di illuminazione
- 2. Sperimenta le impostazioni del bilanciamento del bianco
- 3. Scegli le impostazioni appropriate della fotocamera
- 4. Cattura paesaggi invernali unici
- 5. Incorpora elementi umani nei tuoi scatti
- 6. Prepararsi per condizioni meteorologiche avverse
- 7. Usa un treppiede per immagini più nitide
- 8. Proteggi la tua fotocamera
- Come scegliere l'attrezzatura giusta per scattare foto in inverno?
- Tecniche di post-elaborazione per migliorare le tue foto
- Crea il tuo sito web per portfolio fotografico
L'inverno offre molte opportunità per la fotografia. I paesaggi innevati o l'atmosfera di Capodanno sono affascinanti nell'obiettivo. Ma nel processo della sua creazione possono sorgere difficoltà.
Perché il contrasto tra luce e buio rende questo lavoro impegnativo. Quindi, quando ti prepari per le riprese, dovresti seguire i suggerimenti sulla fotografia invernale:
- Preparati al freddo e tieniti al caldo
- Porta con te una batteria di riserva e schede di memoria
- Seguire le impostazioni corrette della fotocamera

Suggerimenti per la fotografia invernale
Scattare foto in inverno richiede una preparazione dettagliata. Dopotutto, questo è il periodo del gelo, che non piace alla tua fotocamera. Inoltre, la neve nella foto spesso risulta essere tutt'altro che bianca come è. Ciò a volte complica le riprese e richiede un editing fotografico aggiuntivo. Quindi, per rendere questo processo più semplice, prova a impostare l'esposizione su +0,5-1 o superiore.
Seguendo questi consigli potrete migliorare la vostra fotografia dell'inverno . Ma questo non basta per un risultato incredibile. Oltre a questi consigli, tanti altri ti saranno utili come vero fotografo. Quindi mantieni la loro lista:
1. Comprendere le condizioni di illuminazione
La luce del giorno invernale è breve. E il sole è basso sopra l'orizzonte, anche in pieno giorno. Allo stesso tempo, in una giornata limpida, il sole cade nell'inquadratura o crea un'illuminazione troppo forte:
- È meglio scattare in tali condizioni con l'illuminazione laterale . Per questo, dovresti applicare un paraluce. Impedisce alla luce estranea di entrare nella foto. Quindi, aiuta a riflettere la luce in eccesso mentre si scattano foto in inverno .
- Anche le riprese in controluce in inverno danno buoni risultati. Con tale illuminazione, tutto ciò che è traslucido risplenderà dall'interno. L'ideale per questo è fotografare rami e ghiaccioli nebbiosi. Con tale illuminazione in inverno, ottengono un'incredibile bellezza nelle cornici.
- È meglio scattare fotografie in climi freddi al sole . Perché senza la luce del sole l'aspetto della neve non viene espresso nelle immagini.
- Pertanto, il momento migliore per fotografare i paesaggi invernali è la mattina e mezzogiorno. Quindi l'illuminazione esterna è la più favorevole per creare meravigliose foto invernali.
La cosa principale è regolare la fotocamera in base all'illuminazione in modo che la neve non si confonda con l'orizzonte nell'immagine.
2. Sperimenta le impostazioni del bilanciamento del bianco
Molte fotocamere dispongono di impostazioni di bilanciamento del bianco completamente preimpostate. Inoltre, ci sono impostazioni separate per diverse sorgenti luminose. Include "sole splendente", "nuvoloso", "tungsteno" e simili.
Ma queste sono solo impostazioni generali. Nella maggior parte dei casi, sono spesso sufficientemente precisi per le tue esigenze. Ma scattando sulla neve, vuoi ottenere il bilanciamento del bianco il più accurato possibile.
E per questo, devi regolare manualmente questa impostazione per sapere come fotografare l'inverno . Per rendere le immagini più belle, sperimenta il bilanciamento del bianco:
- Non selezionare la modalità di bilanciamento del bianco automatico quando si imposta la fotocamera in un clima invernale soleggiato. Perché? Perché poi la fotografia del freddo acquisisce una tinta gialla. E la neve sembra sporca.
- Impostare il bilanciamento del bianco su una luce più calda . Ad esempio, seleziona la modalità "Luce diurna" invece di "Nuvoloso" in caso di tempo nuvoloso. Imposta questa modalità su circa 5200K.
- Se scatti in RAW o NEF , la temperatura della foto verrà ridotta durante la post-elaborazione. Ma più correttamente imposti le impostazioni della fotocamera, più facile sarà lavorare con il materiale finale.
3. Scegli le impostazioni appropriate della fotocamera
L'inverno è un bel periodo dell'anno. Vedere gli alberi ricoperti di neve bianca come un tappeto è un piacere. E, naturalmente, vuoi fotografarlo per trasmettere questa atmosfera unica piena di miracoli. Ma ci vuole molto lavoro perché i fotografi catturino tanta bellezza.
Tutto ciò che è bianco attorno all'obiettivo non è esattamente come nella realtà. Quindi, dovresti seguire i suggerimenti sulla fotografia invernale sulle impostazioni della fotocamera. Con questo, puoi creare una vera fiaba:
Impostazione della fotocamera | Descrizione |
Composizione |
Una delle migliori regole nella fotografia invernale è la regola del tre. Con esso, dividi l'immagine in una griglia tre per tre e la disponi lungo le linee. Significa che non posizioni gli oggetti al centro. Al contrario, li sposti a destra o a sinistra, dando loro un migliore bilanciamento dell'inquadratura. Se hai qualcosa in primo piano a destra, sarebbe bello avere qualcosa per bilanciarlo sullo sfondo a sinistra. |
Leggero |
È una delle cose più importanti e impegnative da fare con la neve. Consiste nel rendere l'immagine come la vedono i tuoi occhi. Poiché la neve è molto bianca, la fotocamera la percepisce come qualcosa di luminoso. E quindi cerca automaticamente di compensare la luminosità. E rende l'intera immagine più scura e grigia. Quindi, se possibile, elabora l'immagine durante lo scatto. Oppure aumenta gli indicatori di luminosità, conferendo all'immagine un colore bianco chiaro. Questo consiglio per la fotografia invernale ti renderà questo compito molto più semplice. |
Colore |
Per esprimere l'immagine, è necessario selezionare qualcosa di più luminoso in primo piano. Aggiungi qualcosa che risalti sulla neve. È meraviglioso quando è con colori succosi. Ad esempio, può essere un thermos rosso o una sciarpa viola brillante. Il contrasto della luminosità con il bianco della neve rende incredibile la fotografia invernale . |
4. Cattura paesaggi invernali unici
Il sole, il gelo e la neve permettono di creare splendidi paesaggi invernali. In questo periodo dell'anno, le normali immagini si trasformano in vere e proprie opere d'arte. E per fotografare un bellissimo paesaggio invernale, prima di tutto, dovresti aspettare uno specifico stato della natura:
- Se catturi il gelo in uno dei giorni invernali, la tua fotografia in climi freddi avrà successo. Il gelo è l'espressione più bella dell'umidità della nebbia invernale. Non importa su cosa si troverà, se sul ramo di un albero o su una recinzione. La sua presenza nell'inquadratura è essenziale . È la brina che conferisce alla fotografia invernale un fascino unico. Quindi aumenta significativamente il valore artistico dell'immagine.
- Anche la neve sui rami scuri crea emozionanti idee fotografiche. Rende attraenti curve bianche nella cornice. Punta l'obiettivo zoom verso gli alberi e rimarrai stupito dai risultati della foto.
- L'indiscutibile carta vincente di ogni fotografia invernale è la presenza del cielo nell'inquadratura. I cirri sopra le cime delle montagne sono un regalo per un fotografo in inverno. Anche un cielo limpido e senza nuvole di qualsiasi tonalità e saturazione è adatto al paesaggio. La situazione è diversa con tempo nuvoloso e cupo quando il cielo presenta un velo grigio continuo. Ma anche in questo caso puoi farcela e ottenere grandi risultati. Basta saper fotografare l'inverno con le impostazioni corrette.
5. Incorpora elementi umani nei tuoi scatti
Con l'inizio dell'inverno, i fotografi scattano più foto di paesaggi che ritratti. Ma puoi ottenere scatti incredibili incorporando elementi umani nelle tue fotografie per i climi freddi . La cosa principale è sapere come creare correttamente tali immagini in inverno:
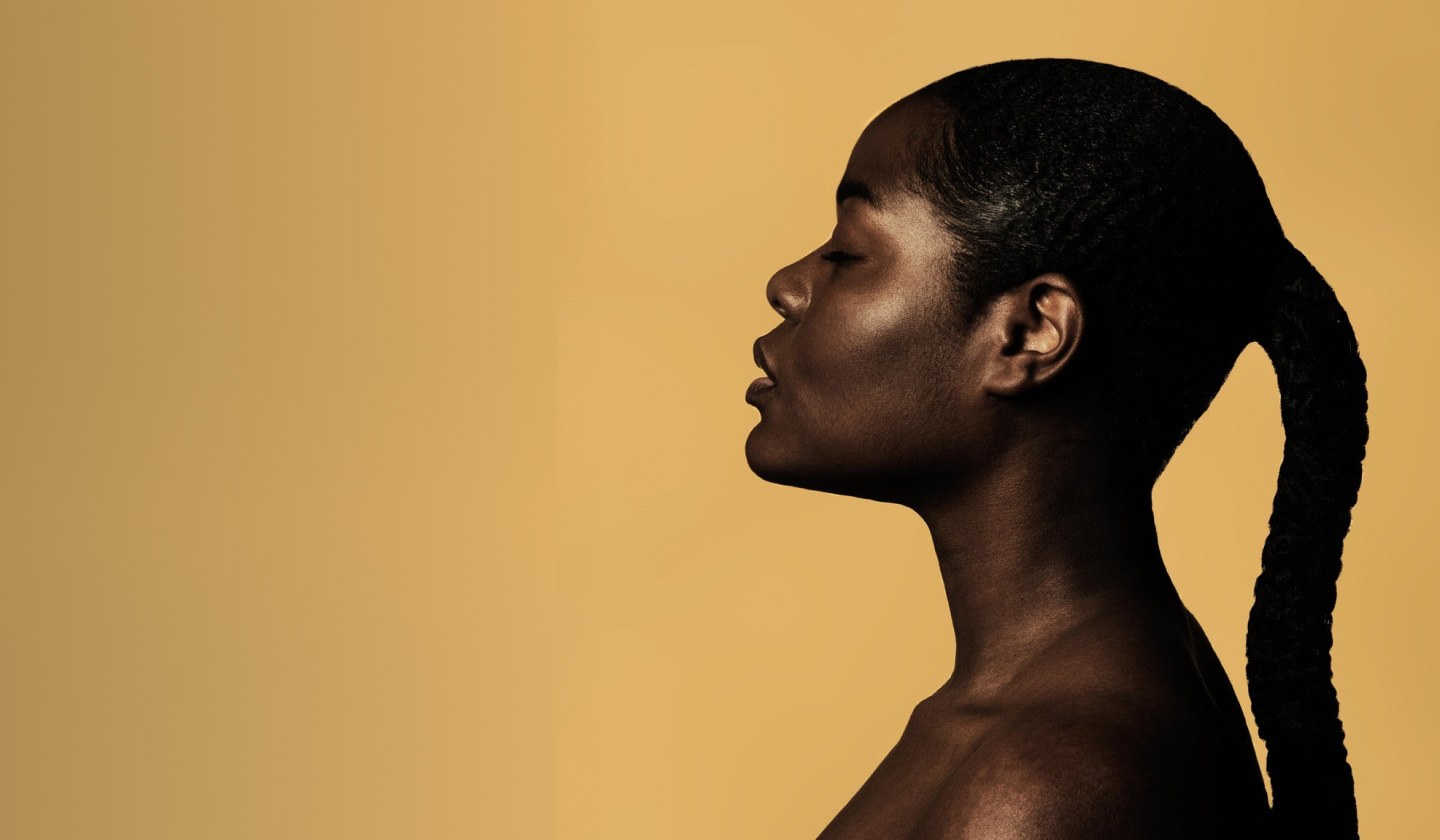
- Attenzione ai nasi rossi
Al freddo, le guance e il naso della modella diventano spesso rossi. Ma se la modella in ogni foto esce con il naso rosso, niente panico. Basta regolare la saturazione nell'elaborazione delle foto. Desaturare i rossi e gli arancioni aiuterà a smorzare i nasi rossi.
- Concentrati sull'uso di colori vivaci nei vestiti
Non scegliere abiti che si adattino al tono quando scatti paesaggi bianchi. Al contrario, fotografa le persone con elementi pronunciati nei loro vestiti. Una tela bianca può essere uno sfondo eccellente per bellissimi cappotti, cappelli e stivali invernali. E i cappelli sono un ottimo modo per incorniciare il tuo viso ed enfatizzare i tuoi occhi.
- Crea l'inaspettato
Trova modi per incorporare qualcosa di inaspettato nei tuoi ritratti invernali. Offri modelli per vomitare la neve sottolineando i guanti luminosi. Dopo questo consiglio fotografico invernale, Includere elementi umani creerà scatti favolosi.
6. Prepararsi per condizioni meteorologiche avverse
Quando si fotografa in inverno, la maggior parte dei fotografi incontra difficoltà. Perché? Perché il freddo ostacola i piani previsti. Le mani fredde e lo scaricamento rapido della fotocamera sono molto fastidiosi.
Dopotutto, non ti consente di creare le cornici che desideri. Ma puoi risolvere questo problema rapidamente. Hai solo bisogno di procurarti conforto nella fotografia con tempo freddo . Quindi, conserva i consigli sulla fotografia invernale :
- Tenere caldo
La cosa più importante sono i vestiti caldi. Dovresti sentire il calore nelle mani, nei piedi e nelle dita. Tutte le opzioni di isolamento a cui puoi pensare, prendile. Indossa un paio di maglioni, una tuta, scarpe calde e giacche. L'unico calore nella stagione fredda può fornirtibuone foto . Dopotutto, se ti senti a disagio, ciò influenzerà gravemente le immagini. E, naturalmente, ricordati di tenere al caldo non solo te stesso ma anche la tua macchina fotografica.
- Riprogramma le riprese se fuori c'è vento
Non scattare foto in condizioni di tempo molto ventoso. Quando fuori c'è vento, è difficile controllare come fotografare l'inverno . È più difficile controllare le espressioni facciali e adattarsi alle pose. Pertanto, è meglio pianificare una sessione fotografica in condizioni meteorologiche più favorevoli. Soprattutto se si tratta di fotografare persone e non paesaggi.
- Scatta dopo la nevicata
I paesaggi invernali più belli escono dopo la nevicata. Soprattutto se il tempo si schiarisce dopo. Poi, sulla morbida superficie della neve, si forma il bagliore del sole e tutto sembra innevato. Il tempo sembra incredibile nell'inquadratura. Quindi offre l'opportunità di creare capolavori fotografici invernali.
7. Usa un treppiede per immagini più nitide
Mentre scatti foto in inverno , usa un treppiede per semplificarti le cose. Quando scatti senza treppiede, non otterrai questo risultato. Dopotutto, la neve, le bufere di neve e il vento in inverno sono ostacoli diretti alla fotografia manuale. Quindi, un treppiede è di grande aiuto in questa situazione:
- Usalo quando c'è scarsa illuminazione nel cortile . Quindi le tue foto non diventeranno granulose e sfocate.
- Impostare la velocità dell'otturatore appropriata quando si utilizza un treppiede. Con l'aiuto di questa attrezzatura, puoi utilizzare impostazioni elevate. Aiuta a creare foto nitide anche in condizioni climatiche buie e ventose.
- Scegli un treppiede stabile . Dovrebbe restare saldamente su qualsiasi superficie e mantenere la fotocamera a livello. Solo grazie a tale forza potrai ottenere la fotografia invernale desiderata .
8. Proteggi la tua fotocamera
A causa della bassa temperatura e della neve, scattare foto in inverno richiede preparazione e protezione:
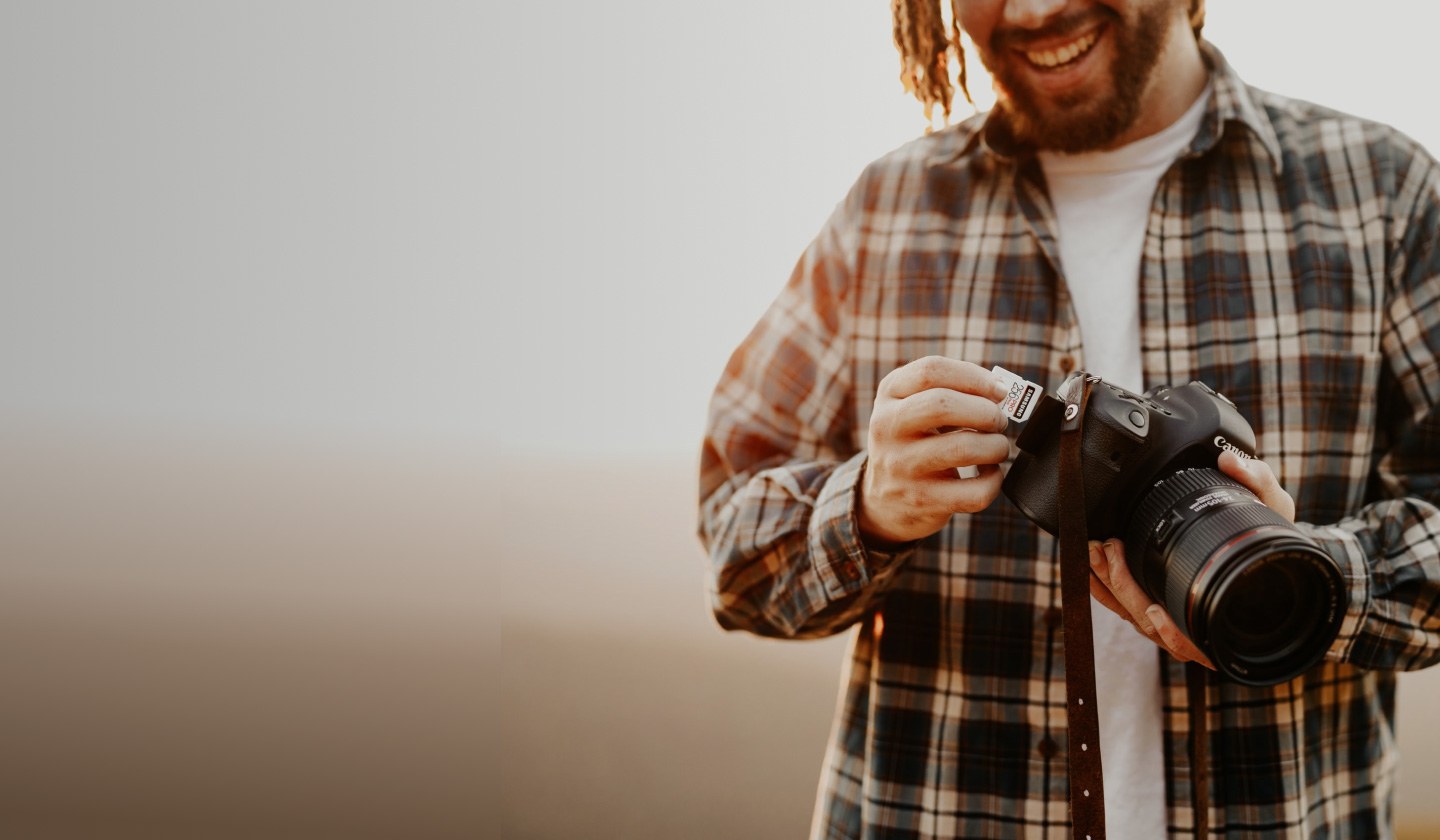
- Prendi una batteria di riserva
Quando fa freddo, la batteria può scaricarsi rapidamente. Quindi, devi avere un sostituto con te. Tienilo nella tasca interna della giacca, al caldo.
- Prendi la scheda di memoria
Dovresti averne di riserva e tenerli al caldo con le batterie.
- Utilizzare una spazzola per rimuovere la neve e i panni in microfibra
Puoi anche utilizzare una custodia protettiva per l'obiettivo e la fotocamera. Risparmia meglio l'attrezzatura.
- Gestisci correttamente la tua borsa fotografica
Dopo essere tornato a casa dalla fotografia in climi freddi , dovresti aspettare per tirare fuori la fotocamera. Aspetta che si abitui alla temperatura della stanza, poi passa a visionare le foto.

Come scegliere l'attrezzatura giusta per scattare foto in inverno ?
La prima cosa a cui prestare attenzione quando si sceglie una fotocamera è la batteria. Durante la fotografia in climi freddi , si scarica molto più velocemente. Pertanto, la scelta della fotocamera dipende non tanto dalla sua funzionalità quanto dalla batteria.
Dopotutto, puoi scattare molte più foto con una buona batteria. Ma oltre a una fotocamera con una buona batteria, per fotografare in inverno hai bisogno della seguente attrezzatura:
- Lente
Dovrebbe essere una scelta individuale. Ma consigliamo di utilizzare solo un obiettivo da 35 mm quando si scattano foto in inverno . Può richiedere scatti più ravvicinati e distanti. Inoltre, un obiettivo del genere è conveniente perché non c'è tempo per cambiare l'obiettivo nella fotografia.
Il freddo e la neve rendono difficile cambiare gli accessori della fotocamera e regolarla per lungo tempo. Pertanto, esiste una sola lente; se necessario, puoi avere uno zoom.
- Borsa fotografica
In inverno durante una sessione fotografica c'è il rischio che si formi condensa sulla fotocamera. E questo rovina la fotocamera e copre l'obiettivo con l'umidità. Per evitare ciò, porta sempre la fotocamera in una borsa fotografica. Tutti i fotografi dovrebbero seguire questo consiglio per la fotografia invernale .
Nella stagione fredda la borsa portafoto aiuta a non creare bruschi sbalzi di temperatura per la macchina fotografica. Quindi, tira fuori la fotocamera, scatta diverse foto e nascondi immediatamente la fotocamera nella borsa fotografica.
Mantiene il calore all'interno e riscalderà gradualmente la fotocamera fino a un certo punto. Pertanto, la fotocamera non percepirà così bruscamente il passaggio dal freddo alla stanza.

Tecniche di post-elaborazione per migliorare le tue foto
La natura in inverno permette non solo di realizzare scatti ma di creare arte. Il tempo sembra splendido in questo periodo. Ma la scena monocromatica trasmette all'obiettivo immagini diverse da quelle che vorremmo vedere.
Quindi, per migliorare le tue foto, utilizza la post-elaborazione dopo la sessione fotografica. Questo consiglio fotografico invernale trasformerà le foto grigie di tutti i giorni in una vera magia e una fiaba:
- Rimuovi oggetti, dettagli o persone non necessari nell'inquadratura.
- Elabora i tratti del viso. Aggiungi luci e ombre ed evidenzia gli occhi con le labbra.
- Aggiungi effetti e, se necessario, neve, bagliore del sole e scintillii.
- Cambia i colori o lavora con ciascuno individualmente.
- Applicare la preimpostazione e filtrare.
- Lavora con luce, ombra, nitidezza, contrasto e saturazione.
Non dovresti eseguire l'elaborazione delle foto per molto tempo. Quindi puoi eccitarti troppo e rendere innaturale la fotografia dell'inverno . Quindi, cerca di non dedicare troppo tempo, ma fai tutto qualitativamente.
Crea il tuo sito web per portfolio fotografico
Il clima invernale mette a dura prova anche i fotografi esperti. Il gelo e le raffiche di vento ostacolano la fotografia in inverno. Ma puoi evitarli conoscendo le regole di base per tali riprese.
Dopo aver creato i tuoi capolavori, devi creare un portfolio . Puoi farlo molto facilmente utilizzando il nostro generatore di portafoglio. Inoltre, non dimenticare di leggere articoli più utili sul nostro blog.