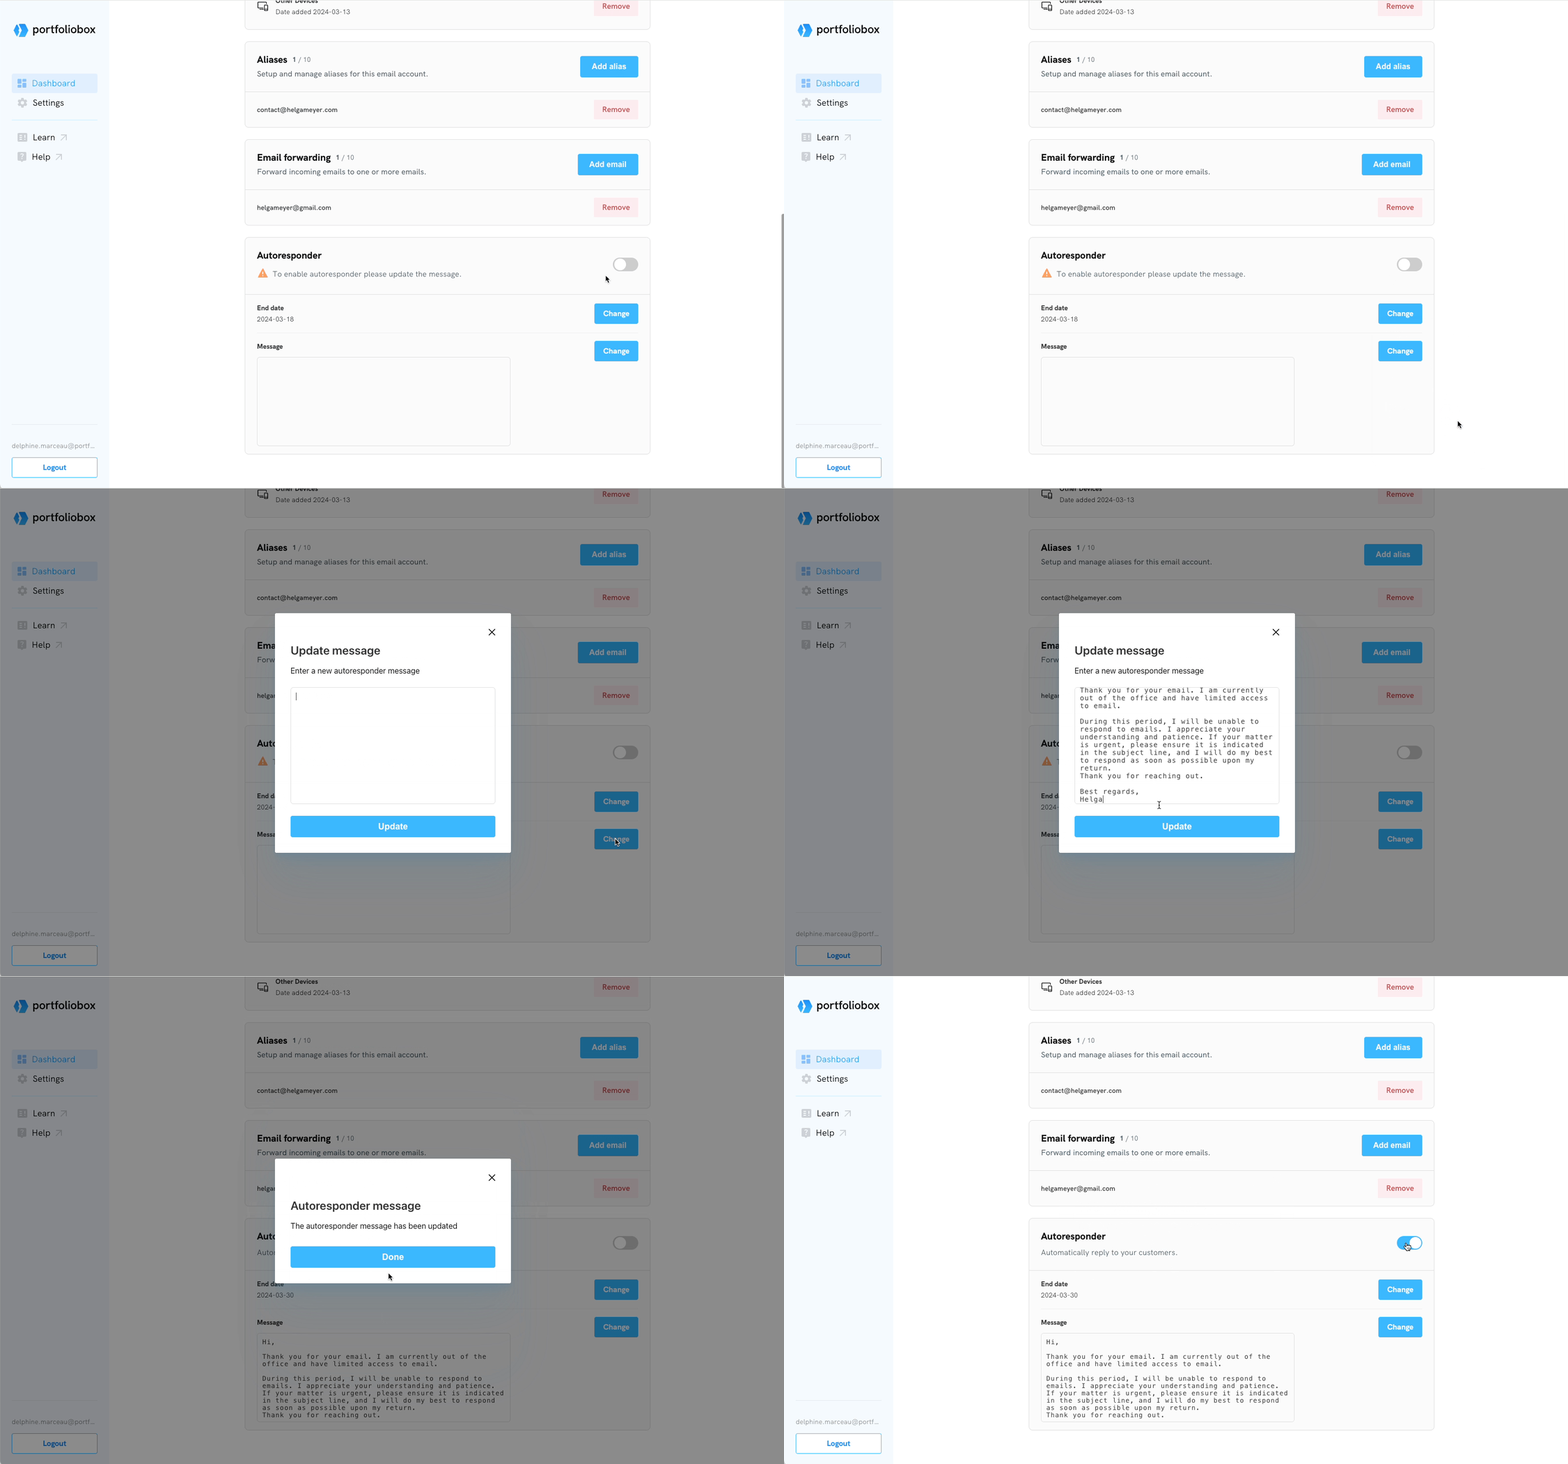
Setting up an autoresponder in your Portfoliobox email account lets you automatically reply to emails, informing senders of your unavailability and when they can expect a response. Here's how to set up an autoresponder to keep your communication professional.
Click the Ellipsis Icon (three dots) icon associated with that website.
SelectEmail Settings.
Navigate to theAutorespondersection.
Configure your autoresponder:
Choose the end date: This ensures that the auto-reply is active only during your specified unavailability period.
Set your message: Write a clear and concise message that will be automatically sent in response to incoming emails. Include relevant information, such as your return date or alternative contact details.
Enable the autoresponder: Toggle the option to activate the autoresponder feature.
Important considerations
The autoresponder feature cannot be enabled if the message is empty or the date has already passed. Please edit the date and add a message before enabling the feature.
The autoresponder will automatically respond to your incoming emails until 23:59:59 on the selected end date.
The autoresponder will automatically be disabled the day after the selected end date.
After signing up, the first thing you want to do is to create your first page. Setting up your first page is not difficult at all, depending on your content
A blog is an online journal that you can share your updates and ideas with your website visitors. It's a good idea to have a blog on your website - it is good
A blog post is an individual entry of your online journal on your Portfoliobox website. In a blog post, you can add different types of content block, upload
Making a draft or setting your post as unpublished is a great feature where you can set your post to not be visible in public while you are still working on it.
The order or placement of your post is determined by the date set of your post. The most recent post will be placed at the top followed by the older posts.
To edit a blog post on your blog, simply follow the steps below: Select the blog page you wish to edit by going to Your Content > Pages. Afterwards, select the
Tag is used to label or give an identification to your post. It gives your visitors an idea of what your post is about. Another benefit of using a tag is to
Comments can help you get feedback from your visitors about your blog posts and improve visitor engagement. This feature is enabled automatically after creating
To check all your blog post comments, simply go to the Cog Wheel Icon > Messages > Blog Tab > Comments. The information is placed in the following order:
Blog Teaser showcases some of the blog posts that can be seen on your blog. Once a visitor of your site clicks the blog post on this section, it will redirect