The website menu is a group of links that makes it easier for users to move across your website's various pages. The main menu will be at the top of your website by default.
There are several ways to add a page to a menu:
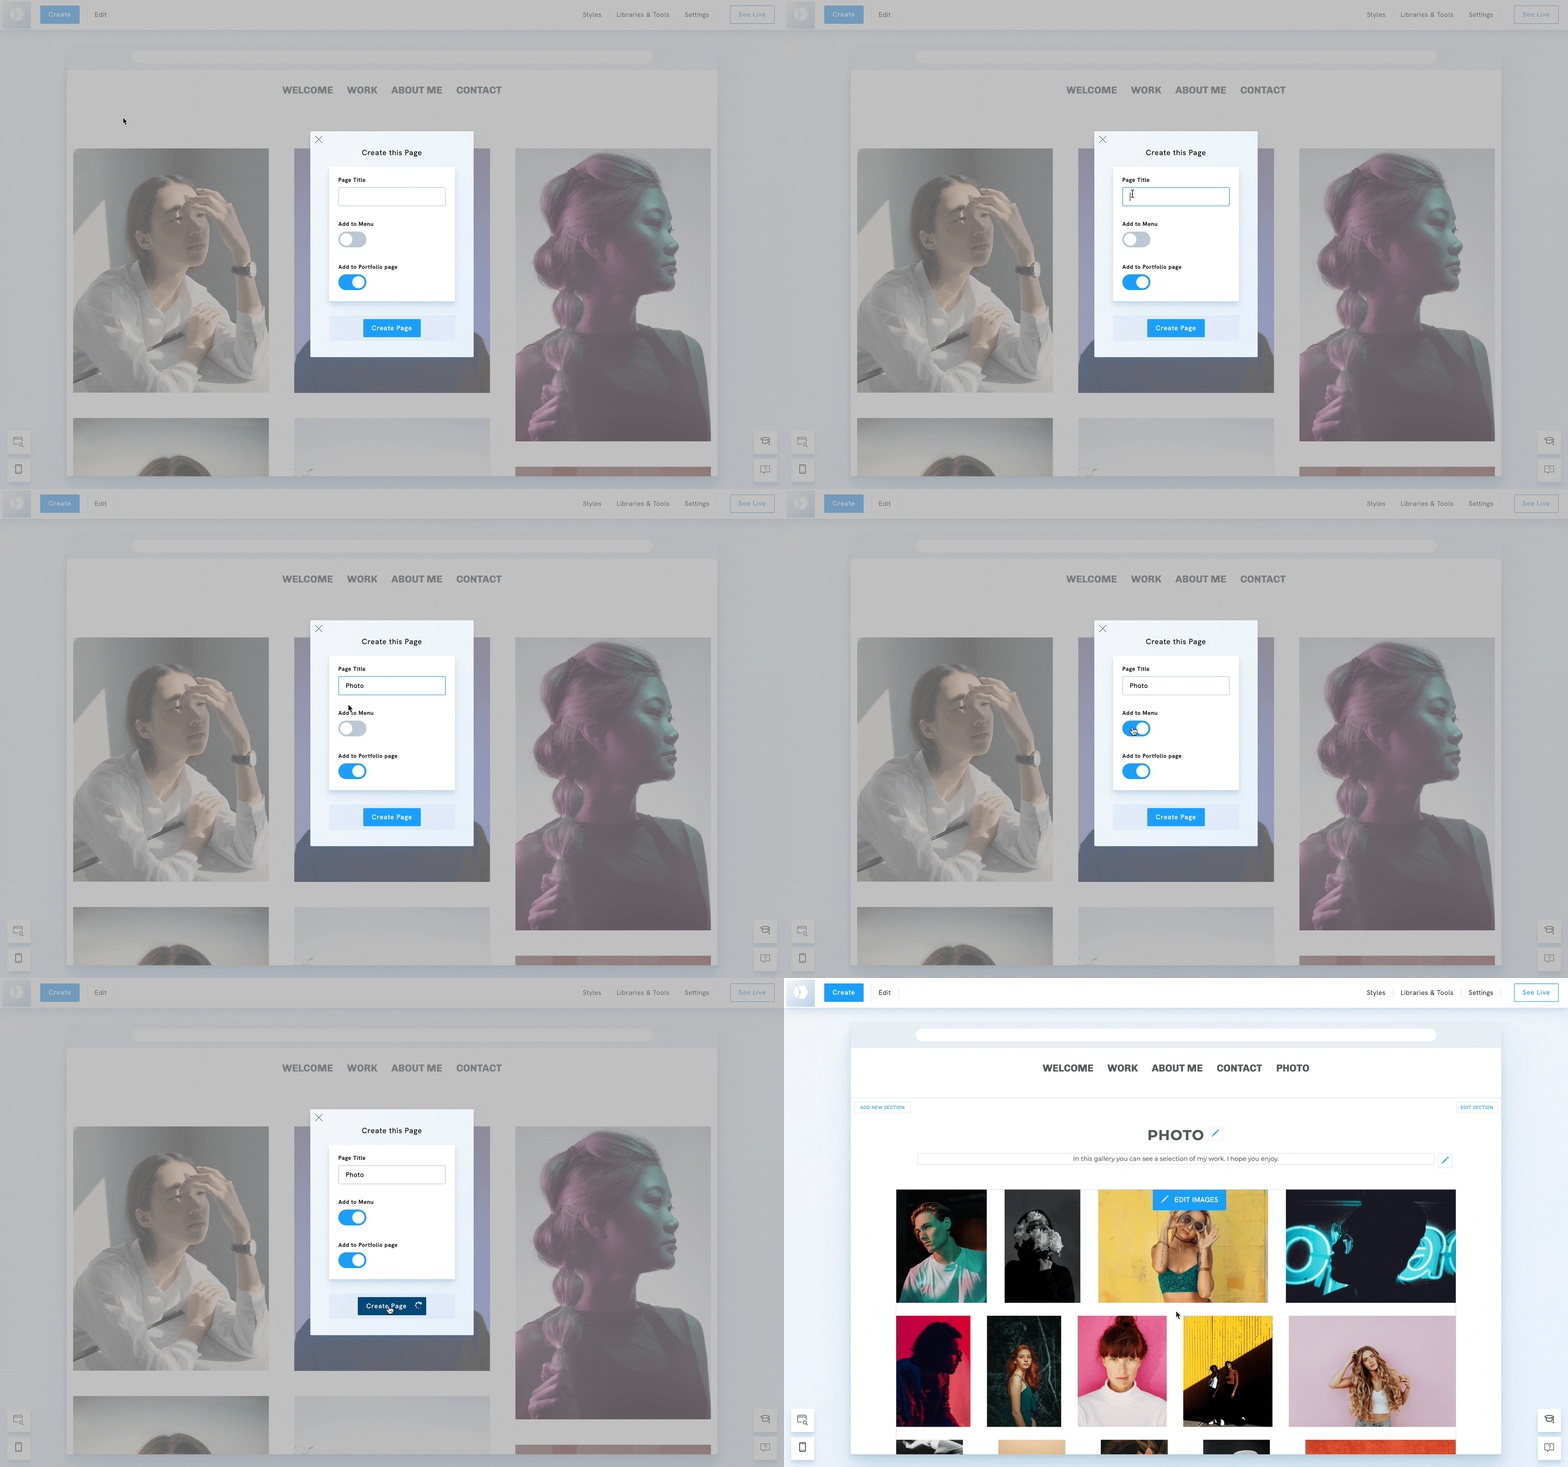
While creating a new page
- Click Create in the top-left corner
- Under Create New Page, choose a page type.
- Choose a template for your page.
- Input a Page Title for your page.
- Toggle the button Add to Menu.

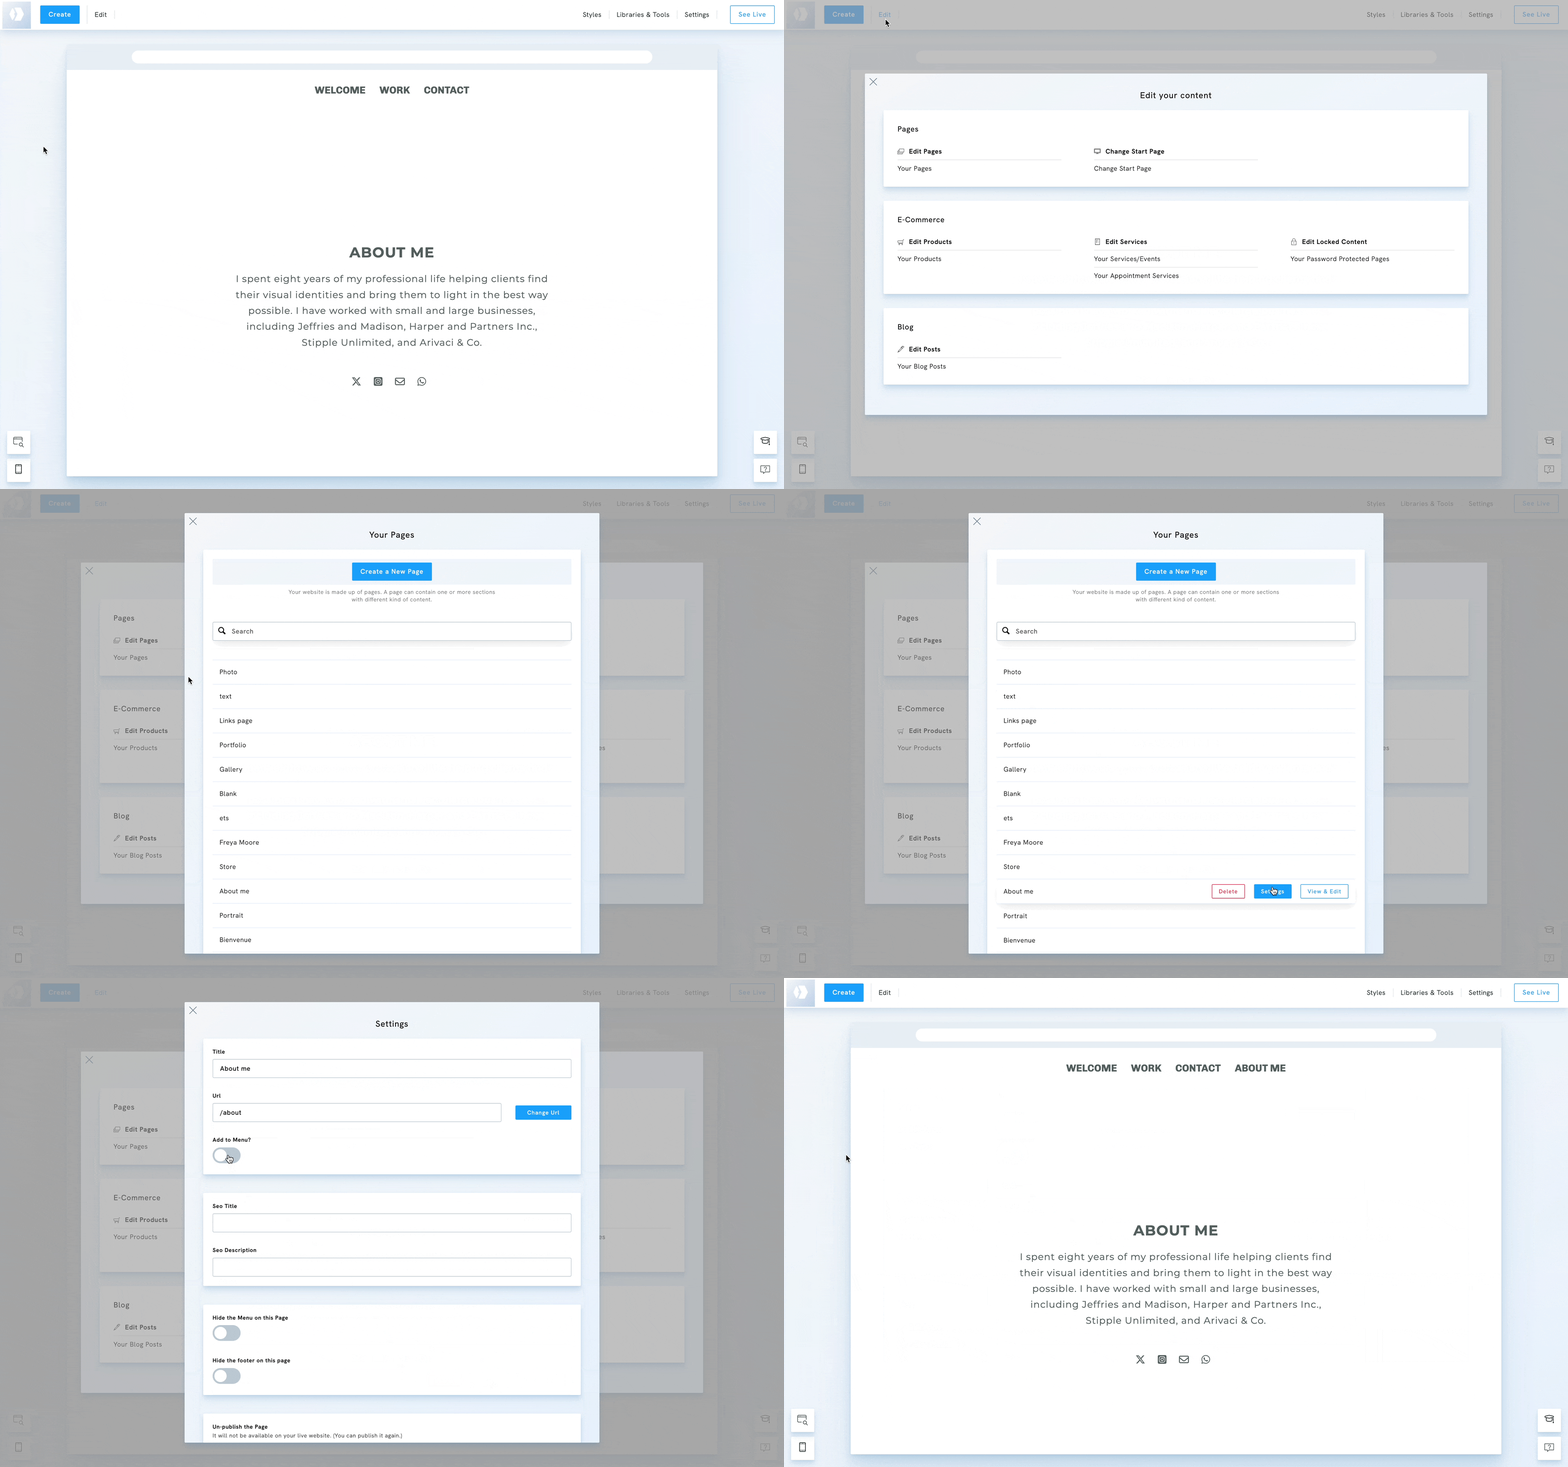
From the Page Settings
- Click on Edit in the top-left corner.
- Select the option Your Pages, under Edit Pages.
- Hover over your page and click Settings.
- Toggle the Add to Menu option to add the page to the menu.

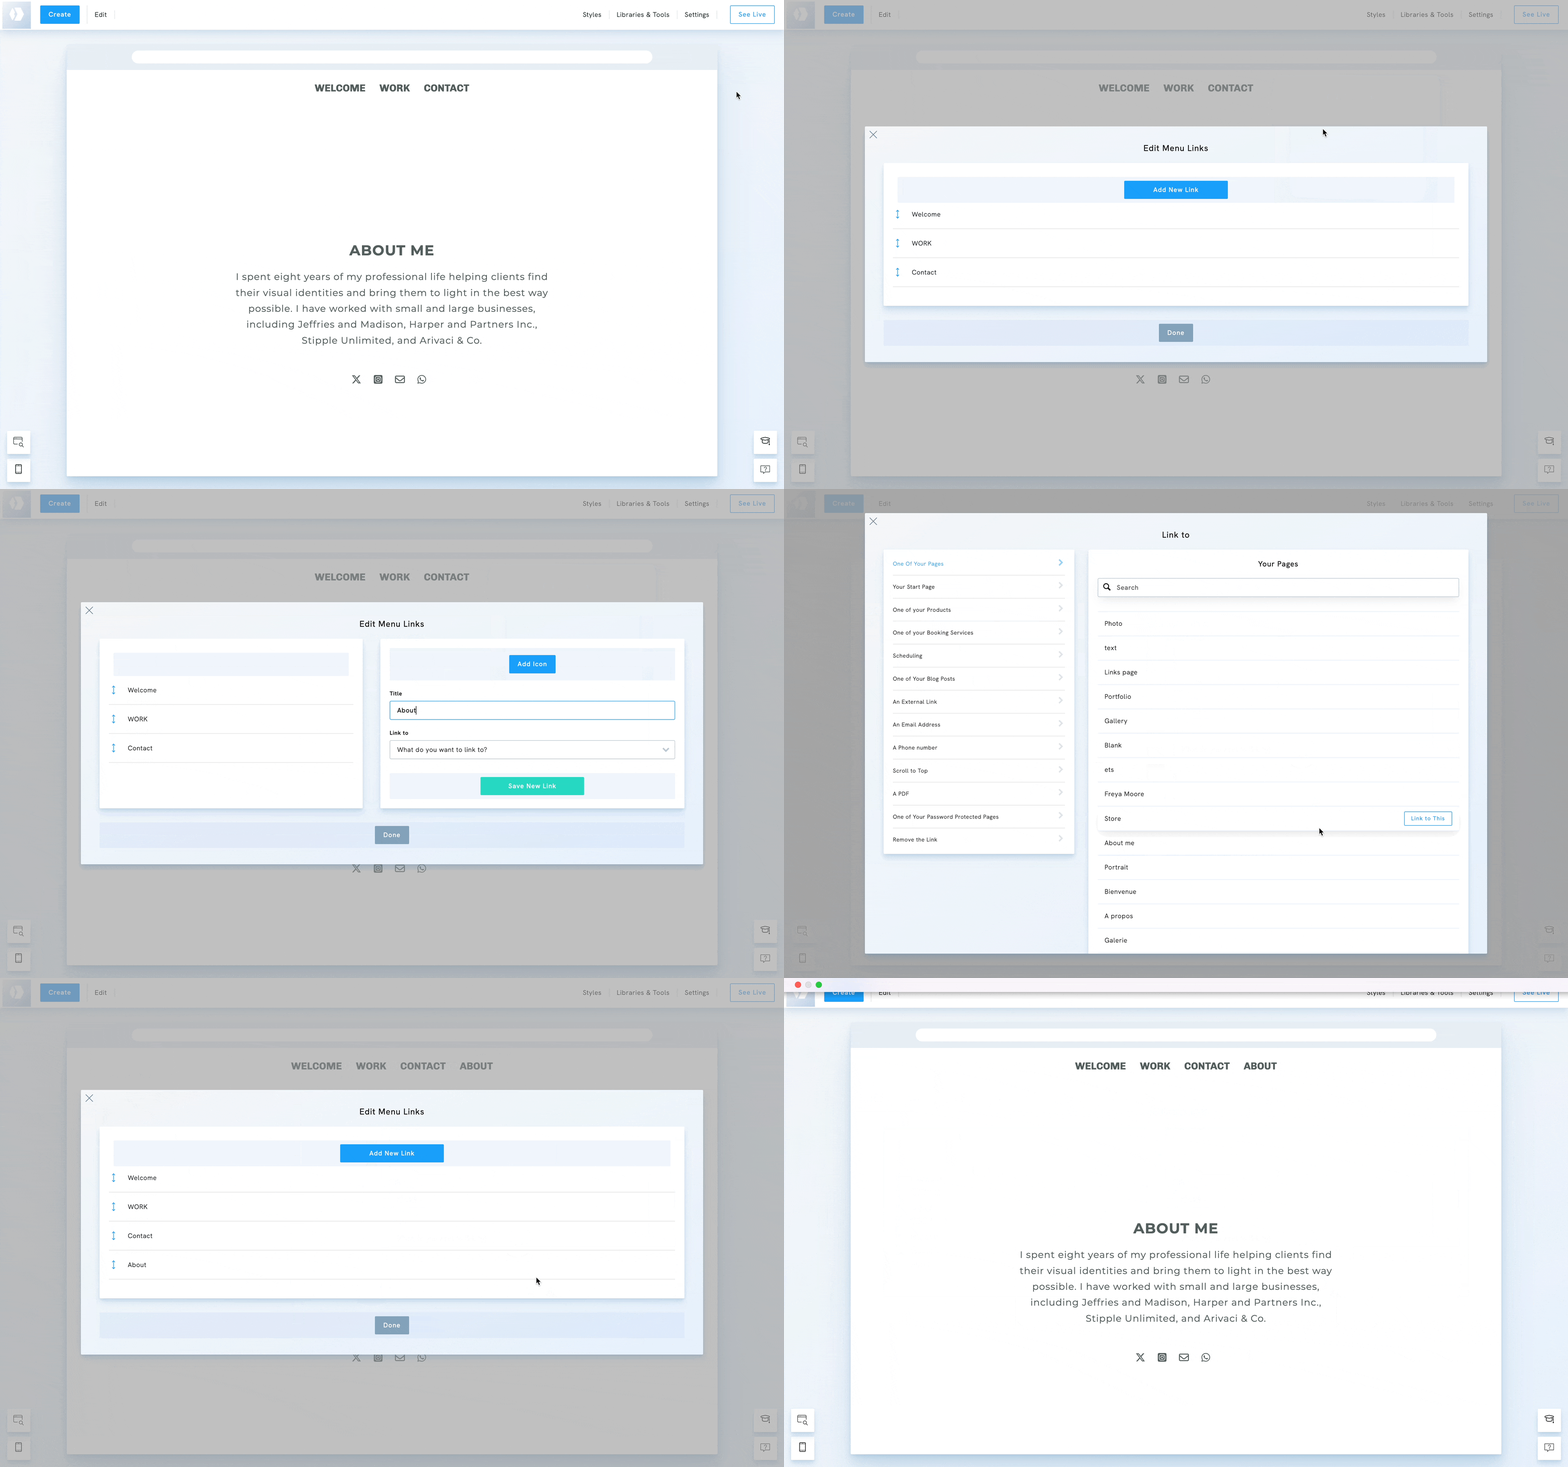
From the Menu Settings
- Hover over the main menu
- Click the Edit menu button at the upper right corner of the menu
- Click on Edit Menu Links.
- On the new window, click the Add New Link button.
- Enter the title you would like to use for the link.
- Click the Link to option after you enter the title.
- Select option One of your pages on the left side of the new window.
- A list of existing pages created on your site will be shown. Hover your mouse over to the page you wish to add as a link. Click the Link to This button beside the page title.
- You will be redirected back to the previous window. Don’t forget to hit the Save New Link button to save the changes


